



7 Tips for Choosing a Freezing Weather Sleeping Bag

Choosing a Freezing Weather Sleeping Bag is a safety decision, not merely a comfort preference. A clear night can become dangerously cold before sunrise. Frost may cover the tent, while damp gloves and compressed insulation quietly reduce warmth.

The Outdoor Industry Association’s 2024 report recorded 175.8 million United States outdoor participants in 2023. That participation supports growing demand for reliable cold-weather equipment. Grand View Research also projects continued growth in the global sleeping bag market. However, market figures vary by research method and product category. That uncertainty deserves attention.

Andrew Skurka, an award-winning long-distance hiker and outdoor educator, explains the basic principle: “A sleeping bag is not a furnace; it preserves the heat your body produces.” His point matters. A low temperature rating cannot compensate for a thin sleeping pad, wet clothing, or poor shelter placement. ISO 23537 testing provides useful comparison standards, but laboratory ratings cannot reproduce every campsite. Wind, humidity, exhaustion, and individual metabolism change the experience.

The following seven tips examine temperature ratings, insulation types, fill weight, sleeping pads, moisture control, fit, and field testing. Each detail matters. A bag rated to -10°C may feel reassuring on paper, yet uncomfortable in real snow. Check the conditions twice. Even experienced campers make assumptions. The right choice balances verified specifications, personal experience, and an honest margin for changing weather.
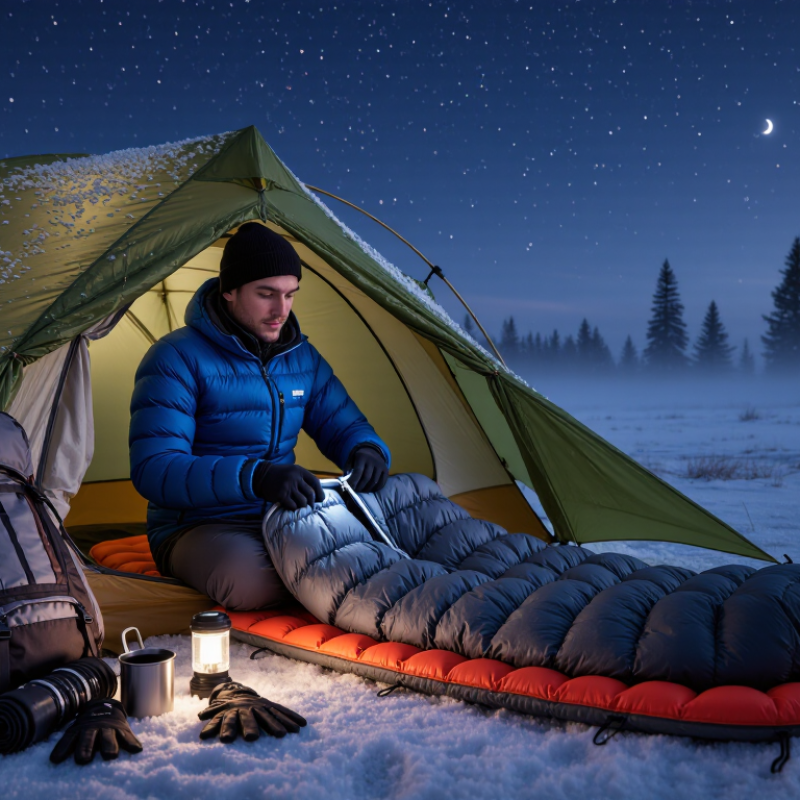
7 Tips for Choosing a Freezing Weather Sleeping Bag

Use ISO 23537 Comfort and Limit Ratings to Set the Cold-Weather Target

7 Tips for Choosing a Freezing Weather Sleeping Bag

Use ISO 23537 comfort and limit ratings to define your cold-weather target. The ISO 23537-1:2016 standard tests sleeping bags with a heated mannequin, controlled clothing, and an insulated sleeping pad. Its comfort rating reflects a standard woman sleeping comfortably. The limit rating reflects a standard man sleeping in a curled position. Do not treat the extreme rating as a buying target. It describes survival for limited hours, with serious hypothermia risk.

Set your target below the coldest forecast. For example, choose a bag with a comfort rating near -10°C for nights around -5°C. Allow extra margin for wind, damp clothing, fatigue, and poor meals. Check the pad’s insulation value too. A warm bag cannot replace a cold, thin sleeping pad.

Select the right size, close the hood, and keep dry base layers inside the bag. Never enter with wet socks.

Seven practical checks matter: read the comfort rating, compare the limit rating, inspect the test standard, match the bag to your pad, protect the insulation from moisture, check hood adjustment, and test your sleep system before departure.

I once trusted a lower rating too much. The label was clear, but my pad was inadequate. That mistake still shapes my choices. Temperature ratings are useful data, not guarantees. ISO testing improves comparison, yet individual metabolism remains unpredictable.

Compare 600–900-Fill-Power Down with Synthetic Insulation

7 Tips for Choosing a Freezing Weather Sleeping Bag

Compare 600–900-fill-power down by checking fill weight, not loft alone. Higher fill power offers more warmth for less weight, but a smaller amount may still feel cold. Tip 1: Compare total insulation weight. Tip 2: Check the comfort rating, not only the lower limit. These ratings are useful, yet personal cold tolerance changes everything. Tip 3: Choose a snug hood and draft collar. Cold air often enters around your neck.

Synthetic insulation usually weighs more and packs larger than 600–900-fill-power down. However, it performs more reliably in damp snow, condensation, or a leaky shelter. Tip 4: Choose synthetic insulation for consistently wet conditions. Tip 5: Choose down when low weight and compact packing matter most. Down can be excellent in dry cold. It becomes far less protective when soaked.

On winter trips, I place a moisture-resistant liner or bivy over the bag. That small layer helps protect insulation from frozen condensation. Tip 6: Inspect the zipper, stitching, and hood adjustment before buying. Weak details can ruin an otherwise warm design. Tip 7: Match the bag to your sleeping pad’s insulation rating, because heat escapes downward. I once trusted a high fill-power bag with a thin pad. My shoulders stayed warm, but the cold ground won. Test your sleep system at home if possible. Forecasts are imperfect. Your setup should allow extra layers without crushing the insulation.

7 Tips for Choosing a Freezing Weather Sleeping Bag — Compare 600–900-Fill-Power Down with Synthetic Insulation
Tip What to Check 600–700-Fill-Power Down 750–900-Fill-Power Down Synthetic Insulation
1. Start with the temperature rating Compare the bag’s tested temperature rating with the lowest conditions expected, and check whether the label gives a comfort rating as well as a lower limit. Warmth depends on the bag’s total down fill, construction, fit, and draft protection—not fill power alone. Higher fill power does not automatically mean a warmer bag; compare the actual temperature ratings and design. Use the same rating information. Insulation type alone does not establish a bag’s temperature performance.
2. Understand fill power Fill power measures how much space a given weight of down occupies under a standardized test. It describes down loft efficiency, not a temperature rating. 600–700 fill power is generally less loft-efficient than higher-fill-power down, so more down weight may be needed for similar loft. 750–900 fill power can provide more loft per unit of down weight, which can help reduce packed weight. Fill power is not used to rate synthetic insulation. Compare the bag’s tested warmth, weight, and packed size instead.
3. Plan for moisture Consider condensation, snow, damp shelters, and how reliably you can keep the bag dry. Down can lose much of its insulating loft when thoroughly wet and may take longer to dry. A dry storage system is important. High-fill-power down is still down: its loft advantage does not remove the need to protect it from moisture. Synthetic insulation generally retains more of its insulating ability when damp and usually dries faster, though a wet bag still performs worse than a dry one.
4. Compare carried weight Compare complete bags at similar temperature ratings and sizes—not insulation labels in isolation. Can be a practical lower-cost down option, but comparable warmth may require more insulation weight than a higher-fill-power design. Often offers a strong warmth-to-weight advantage when the bag is well designed and correctly sized. Often weighs more than a down bag with comparable warmth, but exact differences depend on materials and construction.
5. Check packed size Look at the packed dimensions or volume and confirm the bag fits your pack without compressing it unnecessarily for long-term storage. Usually compresses well, though it may pack larger than a higher-fill-power down bag with comparable warmth. Typically compresses to a smaller volume for comparable warmth, subject to the bag’s design and shell fabrics. Usually packs bulkier than down with comparable warmth; the degree varies by insulation type and bag construction.
6. Inspect construction and fit Look for well-distributed insulation, secure baffles or compartments, a draft collar, a close-fitting hood, and a shape that leaves room to sleep comfortably. Check that the down is distributed evenly and cannot shift away from key areas such as the top and sides. Higher loft makes sound baffle design especially important; inspect for cold spots and gaps around the shoulders and zipper. Check for even insulation coverage and areas where the fill might compress or leave cold spots.
7. Match care and budget to your use Consider purchase cost, cleaning instructions, drying time, and how often the bag will be used in cold or damp conditions. Often costs less than high-fill-power down, but follow the care label and store it loosely when not in use. Often costs more than lower-fill-power down. Keep it dry and follow the manufacturer’s washing and storage directions. Often costs less than down and can be a sensible choice for damp trips. Follow the care label and dry it thoroughly before storage.
Comparison note: Fill-power figures apply to down only and are not directly comparable with synthetic insulation ratings. For cold-weather selection, compare independently tested temperature ratings, bag weight, packed size, fit, and moisture conditions together.

Select a Mummy Shape to Minimize Air Volume and Heat Loss

A mummy-shaped sleeping bag is a practical choice for freezing weather because it reduces empty space around your body. Less air means less warmth is lost while you sleep. The tapered design follows your shoulders, hips, and feet instead of leaving a large, cold pocket inside. I noticed this difference during a frosty campsite night. My wider bag felt spacious, but my feet stayed colder than expected.

Choose a shape that fits closely without restricting movement. You should bend your knees and wear a thin base layer comfortably. A tight bag can compress insulation and create cold spots. Check the hood, too. It should surround your head without blocking your breathing. A draft collar near the neck is also useful, especially when wind slips through the zipper area. Small details matter.

I still get this choice wrong sometimes. A very narrow bag saves heat but can feel difficult when changing clothes. Look for enough shoulder room to turn slightly, not enough space to sit upright. Keep thicker clothing outside the bag if it compresses the insulation. Also compare the bag’s temperature rating with your actual sleeping conditions, because shape alone cannot prevent hypothermia. Open the zipper briefly if you become damp inside. Moisture weakens insulation, and a warm bag can become uncomfortable surprisingly fast.

Check Hood, Draft Collar, Fit, and Zipper Design for Heat Retention

A freezing-weather sleeping bag can lose warmth through small design gaps. ISO 23537-1 ratings come from tests on a heated thermal manikin, not a sleeping person. Treat the comfort rating as a planning reference, not a promise. The lower-limit rating reflects curled sleeping, while the extreme rating signals survival conditions, not safe comfort.

Check the hood first. It should turn with your head and tighten around the cheeks without blocking breathing. A draft collar must sit firmly against your shoulders and neck. I have found that a loose collar can feel cold within minutes. Fit matters too. Excess space leaves more air for your body to warm. A very tight bag compresses insulation and may feel colder. Leave enough room to wear a light base layer.

The zipper deserves hands-on testing. Choose a model with an insulated zipper flap and a pull that works with gloves. A snagging zipper can force you to open the bag and release stored heat. Research from the U.S. Army Natick Soldier Systems Center has long used thermal manikins to evaluate clothing insulation, showing why small openings affect total warmth. Still, ratings can disappoint in wind, dampness, or fatigue. I sometimes overestimate my tolerance. That mistake feels minor indoors, but serious at camp. Test the hood, collar, and zipper before leaving home.

Pair the Bag with an ASTM-Rated Pad at R-Value 4 or Higher

7 Tips for Choosing a Freezing Weather Sleeping Bag

A warm sleeping bag cannot compensate for a cold, poorly insulated ground. I learned this after waking with numb hips at 20°F. The bag felt thick, but my thin pad compressed beneath me.

Choose an ASTM-rated sleeping pad with an R-value of 4 or higher. ASTM F3340/F3340M measures pad thermal resistance under controlled laboratory conditions. That number offers a useful comparison between products. It does not predict every campsite. Frozen soil, wind, moisture, and body weight can change performance. A higher R-value generally reduces heat loss through the ground. At freezing temperatures, I prefer extra margin rather than the minimum specification.

Layering pads can also help. Their combined resistance is commonly treated as additive, although field conditions may reduce the expected benefit. Place the more insulating pad beneath the softer pad. Check that both remain fully inflated. Small gaps near your shoulders or hips can create noticeable cold spots. The sleeping bag’s temperature rating also assumes an adequate sleeping pad, according to ISO 23537 testing procedures. Without that support, the rating becomes misleading. It is an easy detail to overlook.

Industry testing is valuable, but personal testing still matters. Try the complete sleep system before a remote winter trip. Wear dry base layers, protect the pad from punctures, and measure your comfort honestly. My mistake was trusting the bag’s label more than the ground beneath it.