
How to Install Mounting Hooks on Any Wall?

A hook seems simple until it starts pulling away from the wall. The right mounting hooks and fixing method depend on the wall’s material, the object’s weight, and how often it will be used. Drywall, plaster, brick, and concrete each need different anchors or screws. A hook that holds a light key ring may not safely support a full coat rack. Small details matter.

This guide explains how to install mounting hooks on common wall types, from choosing a suitable location to checking the finished fit. You’ll learn how to find a stud, select an anchor, mark level positions, and drill a correctly sized pilot hole. A stud finder can help locate framing, while a detector may reveal hidden wiring or pipes. Check the tool instructions and the hook maker’s load rating before drilling. For masonry, use a drill bit and wall plug designed for that surface. For hollow drywall, use an appropriate anchor when no stud is available.

Measure twice. Drill once.

Even careful measurements can leave a mark in the wrong place, so test the layout with painter’s tape first. If the wall crumbles, the anchor spins, or the hook feels loose, stop and reassess rather than adding more force. Wall construction varies, and no single fastener suits every home. A secure installation starts with matching the hardware to the surface and the load.
How to Install Mounting Hooks on Any Wall?

Choosing the Right Mounting Hook and Wall Fastener

How to Install Mounting Hooks on Any Wall?

Choosing the Right Mounting Hook and Wall Fastener

A secure hook starts with the wall, not the hook itself. Tap the surface and listen for a solid or hollow sound. A stud offers strong support for heavier items. Hollow drywall needs a suitable hollow-wall anchor. Masonry requires a plug and screw designed for brick or concrete. Tile needs careful drilling and a compatible anchor behind the surface.

Match the fastener to the load, hook design, and wall material. Check the package rating, but leave a safety margin for movement and repeated use. A hanging coat rack creates more stress than a framed picture. For a stud, use a screw long enough to enter solid wood securely. For drywall, avoid relying on the thin board alone. The anchor must expand or grip behind it.

I once installed a small hook near a wall edge and ignored the softer plaster underneath. It held briefly, then loosened. That mistake taught me to test the surface before drilling. Mark the position, check for hidden cables or pipes, and drill a clean pilot hole. Keep the drill level. Do not force a large anchor into a small opening. After installation, pull the hook gently and inspect for movement. If the wall crumbles, the hole feels loose, or the hook tilts, stop and reassess the fastener.

Gathering Tools and Preparing the Wall Surface

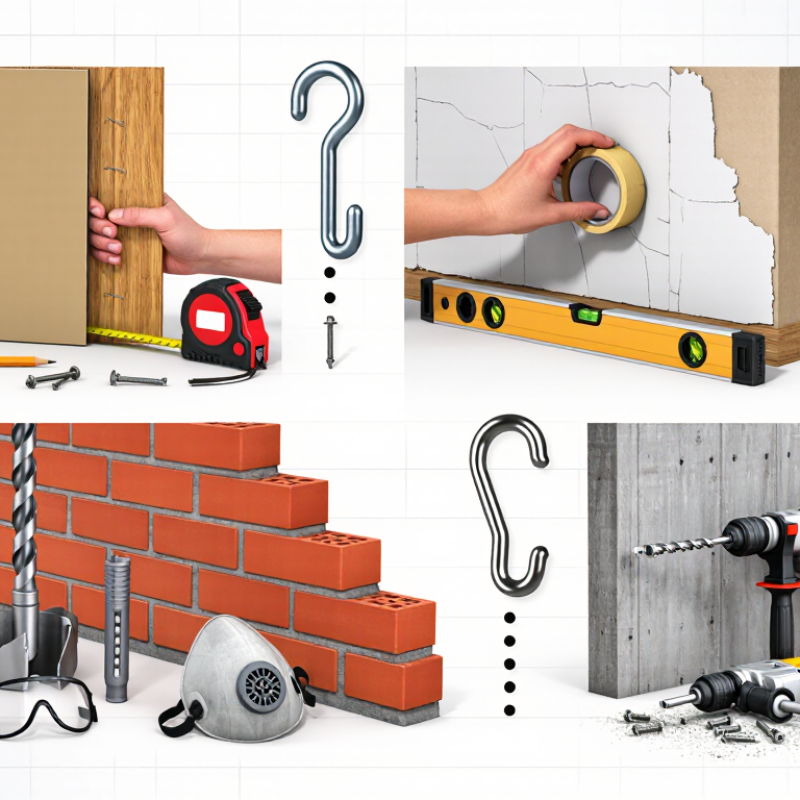
Mounting hooks begin with the right tools, not the drill. Prepare a tape measure, pencil, spirit level, stud finder, drill, suitable bits, wall anchors, and safety glasses. Keep a small vacuum nearby for dust. Use a tape measure twice; uneven spacing is difficult to correct later. Check the wall for studs, pipes, and electrical cables before marking each position. A wall can feel solid and still hide wiring.

Identify the surface before choosing hardware. Drywall usually needs rated hollow-wall anchors unless the hook enters a stud. Brick and concrete require masonry bits and compatible anchors. Never treat one fastener as universal. Check the hook’s load rating, then leave a safety margin for sudden pulling or repeated movement. For heavier items, test the anchor with controlled pressure before hanging anything valuable.

The wall must also be clean and dry. Remove loose paint, grease, and fine dust with a dry or lightly damp cloth. The U.S. Environmental Protection Agency recommends indoor relative humidity near 30% to 50% for moisture control, according to its Moisture Control Guidance. High humidity can weaken some surfaces and encourage hidden mold. Let recently patched areas cure fully. Use a stable step ladder, not a chair; NIOSH safety reporting identifies ladders as involved in about 43% of fatal falls. My first attempt often looks accurate, but I still recheck level and spacing before drilling. That pause prevents avoidable holes.

How to Install Mounting Hooks on Any Wall? - Gathering Tools and Preparing the Wall Surface

Recommended tools and surface-preparation steps by common wall type. Load ratings are typical guidance only; always follow the selected hook and anchor manufacturer’s instructions.
Wall Surface Essential Tools Surface Preparation Recommended Fastener Typical Working Load Estimated Time
Drywall with Wood Stud Stud finder, pencil, level, drill, screwdriver, drill bit Remove dust, confirm the stud center, and check that the area is free of visible damage. Wood screw driven directly into the stud Often suitable for medium to heavy loads when the screw is properly sized and embedded. 10–20 minutes
Hollow Drywall Stud finder, level, drill, small drill bit, screwdriver, vacuum Inspect for cracks, locate electrical or plumbing hazards, and clean loose gypsum from the hole. Self-drilling anchor or toggle-style hollow-wall anchor Light to medium loads; capacity varies substantially with anchor size and drywall thickness. 15–25 minutes
Plaster over Lath Stud finder, level, masonry bit, drill, screwdriver, eye protection Check for loose plaster, avoid crumbling edges, and locate a framing member whenever possible. Screw into a stud or an anchor rated for plaster and lath Light to medium loads unless securely attached to framing. 20–30 minutes
Concrete Level, hammer drill, masonry bit, tape measure, brush or vacuum, safety glasses Remove dust and grit from the drilling area; verify that the hole will not intersect embedded services. Concrete screw or expansion anchor Medium to heavy loads when the hole diameter, depth, and embedment match the anchor requirements. 25–40 minutes
Brick or Masonry Block Level, hammer drill, masonry bit, tape measure, brush or vacuum, dust mask Drill into the brick face rather than the mortar joint when possible; clear all drilling dust. Masonry screw or suitable expansion anchor Light to heavy loads depending on masonry condition, anchor type, and embedment depth. 25–40 minutes
Ceramic Tile over Backer Board Level, measuring tape, tile or diamond bit, drill, masking tape, eye protection Mark with masking tape, drill slowly without hammer action, and keep the bit cool when required. Anchor selected for the underlying backer board or framing Light to medium loads; tile alone is not a structural support. 30–45 minutes
Painted or Finished Surface Level, pencil, clean cloth, drill, screwdriver, utility knife Clean grease and dust, repair loose paint, allow repairs to dry fully, and lightly score thick paint if needed. Fastener matched to the wall material beneath the finish Determined by the substrate and anchor, not by the paint layer. 15–30 minutes, excluding repair-drying time
Safety Check: Before drilling, inspect the area for electrical cables and plumbing. Wear eye protection, use the correct bit for the wall material, and do not exceed the fastener’s stated load rating. For valuable or heavy items, attach the hook to structural framing whenever possible.

Locating Studs, Anchors, and Suitable Mounting Points

Installing mounting hooks starts with the wall itself, not the hook. Tap across the surface and listen for a firmer, less hollow sound. Use a stud finder, then confirm the result with a small probe hole. Studs provide dependable support for heavier items, but they may not align with your preferred mounting point. Measure from corners, outlets, or trim to record the stud position. I once trusted a single reading and drilled beside the stud. The hook held poorly. That mistake was avoidable.

When no stud aligns with the mounting point, choose an anchor suited to the wall material and load. Drywall, plaster, brick, and tile each require different drilling methods. Check the anchor’s stated capacity, and treat it as a limit, not a target. A framed mirror may create more pulling force than its weight suggests. Keep the hook level, mark every hole, and check for hidden cables or plumbing before drilling. For tile, use a suitable bit and low pressure. Cracks can spread quickly. Stop if the surface flexes or crumbles.

Tips: Hold the object against the wall before marking. This reveals awkward clearance near doors and cabinets. Use two mounting points when the item can twist. Tighten screws firmly, but do not crush drywall. Test with a gentle downward pull, then add weight gradually. Recheck the hook after a day. Walls shift, and my carefully measured installation was slightly crooked by morning. Small corrections are part of careful work.

Installing the Hook Securely on Different Wall Types

A secure hook begins with knowing what is behind the paint. Tap the wall and listen for a solid sound, but do not rely on tapping alone. A stud finder can help locate framing in drywall. Drive the hook’s screw into the stud when possible; it usually holds better than a plastic anchor. Check for pipes and wiring before drilling. This step is easy to rush.

For hollow drywall, choose a hook and anchor rated for the item’s weight. Drill the specified hole, keep it straight, and tighten the anchor without crushing the wall surface. On plaster, avoid hammering near brittle edges; a small pilot hole can reduce cracking. Brick and concrete need a masonry bit and a compatible anchor. Wear eye protection, and clear dust from the hole before installing the fastener.

Tile needs extra patience. Mark the spot with tape, use a tile-rated bit, and drill slowly without hammer mode. Stop if the tile shifts or cracks. I have found that hooks often fail because the load was guessed, not measured. Weigh the object, include any movement or pulling, and leave a margin below the hook’s rated capacity. After installation, tug gently before hanging anything valuable. The wall may still surprise you.

Testing the Mounting Hook and Checking Its Load Capacity

How to Install Mounting Hooks on Any Wall?

A secure mounting hook begins with the wall, not the hook. Tap the surface and inspect for hollow areas, studs, cracks, or loose plaster. Choose an anchor designed for that wall type. A drywall anchor cannot safely replace a masonry fixing. Mark the position carefully, then check for hidden pipes or electrical cables before drilling. Keep the hook level. Small errors become obvious when an object hangs from it.

Testing the Mounting Hook and Checking Its Load Capacity

After installation, test the hook gradually. Start with a light object, such as an empty bag, and wait several minutes. Add weight in small steps while watching for movement, bending, cracking, or widening holes. Never test with a valuable or fragile item first. Compare the expected load with the hook and anchor ratings, then leave a generous safety margin. Dynamic loads matter too. A swinging coat or dropped tool can create more force than its weight suggests. Stop immediately if the wall creaks or the hook shifts. I once trusted a firm-looking plaster surface too quickly; it needed a different anchor.

Tips: Use a bathroom scale to measure the test load. Pull downward and slightly outward, matching real use. Recheck the hook after one day and again after a week. Humidity, vibration, and repeated loading can weaken some surfaces. If the wall condition is uncertain, use a professional assessment instead of guessing.